
Recently I have been working on a project that had quite a few physical Linux servers, mainly of the the CentOS distribution. I have done the odd one here and there in the past but never really documented the process and with me attempting to update my blog more frequently what better place to document it.
First I will give a brief overview of the process then will detail the how-to. This post is for physical to virtual (P2V), I did have to tackle a few virtual to virtual (V2V) that were based on KVM to VMware which I will also document.
Overview
The version of Converter used during this project was 5.5.0 build 1362012 and CentOS versions 4.9, 5.1 and 6.5 x64. The sole use of converter may work on your combination of Converter, ESX and CentOS but in my case I had to create a new initial RAM disk as the converted VM would kernel panic due to disk configuration changes.
- Document kernel version
- Use VMware Converter to convert machine
- Create a new initial RAM disk
- Configure Network Connection
- Install VMware Tools
Kernel Version
To start we need to take note of the kernel version that is currently running on the physical host, we will need this in order to rebuild the RAM disk.
Running the following command on the physical server:
uname -r
Converter
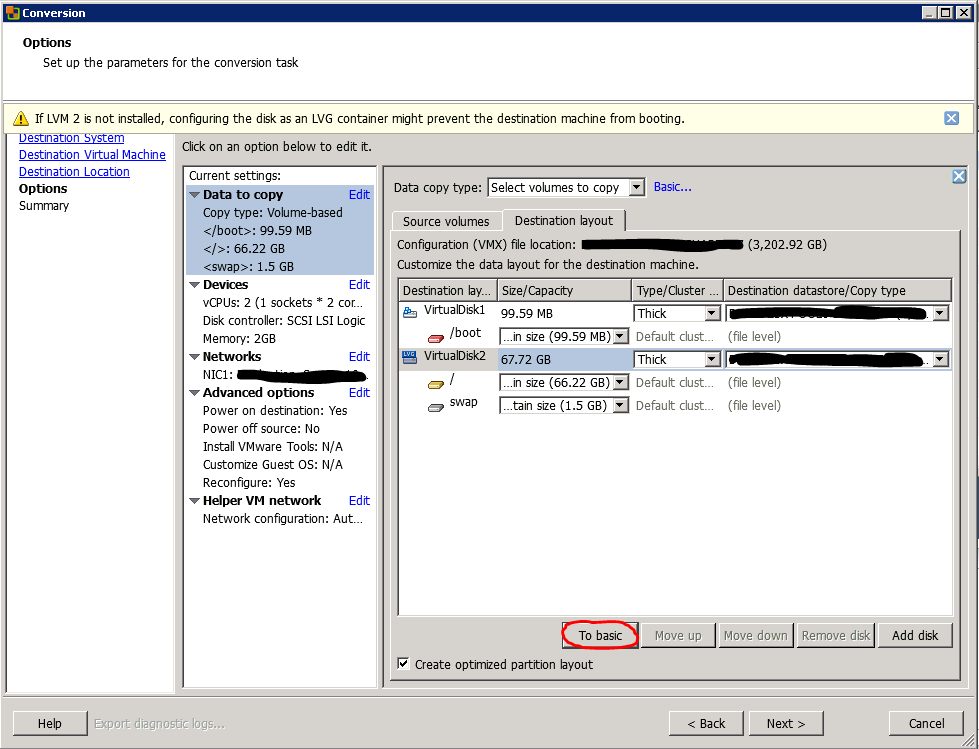
Go through the normal process of using converter but when you get to the Options section of the wizard, under Data to copy, click Advanced -> Destination Layout and change all virtual disks from LVG to Basic by clicking the button pictured.
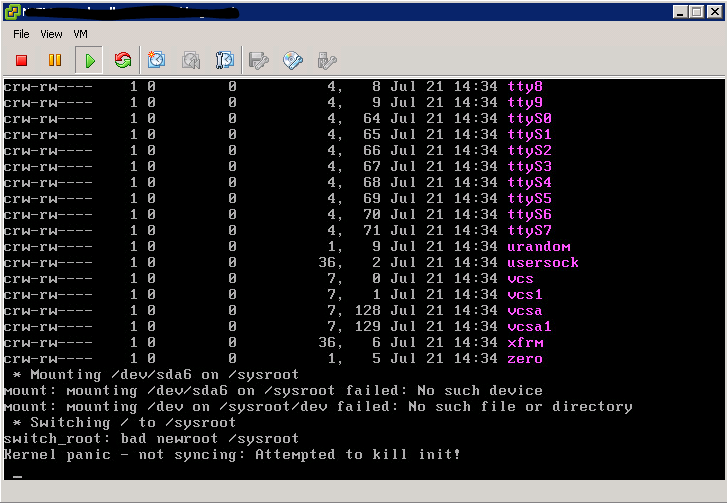
Once the migration is complete when you boot the server it will kernel panic as pictured below which takes us onto the next step.
RAM Disk
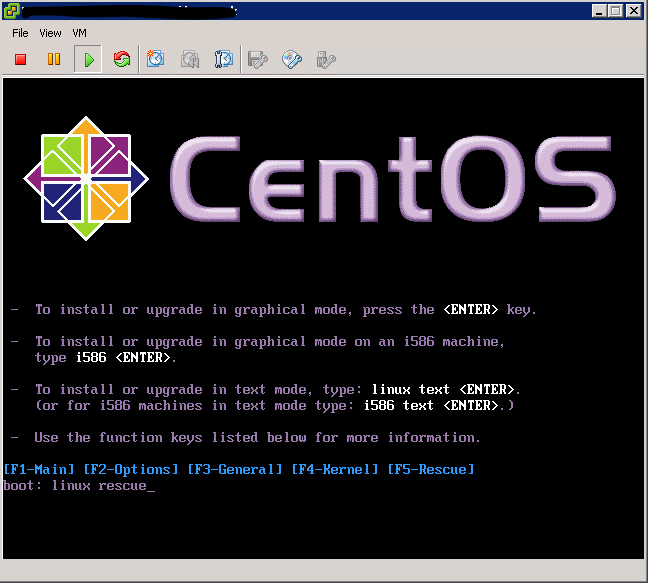
Boot in Rescue Mode by booting from a CentOS installation disc (for example, CD #1 or DVD). Make sure you set the VM to boot into the BIOS so you can boot from the ISO.
Type “linux rescue” at the “boot:” prompt.
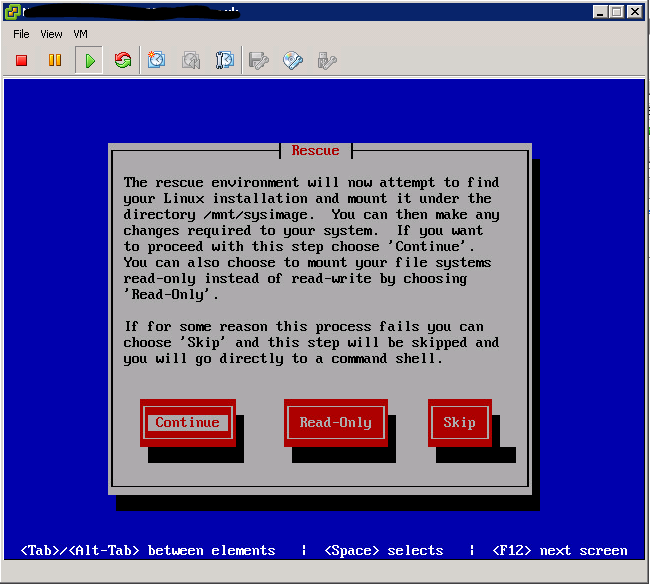
Select your language and keyboard type and select “No” at the Network interfaces prompt.
Mount all filesystems in read-write mode by selecting “Continue” then on the next screen hit “OK”.
Change root to real root (‘/’) on your hard disk by running the folliwing.
mount –bind /proc /mnt/sysimage/proc
mount –bind /dev /mnt/sysimage/dev
mount –bind /sys /mnt/sysimage/sys
chroot /mnt/sysimage
- For CentOS 6:
Create a backup copy of the current initramfs using the kernel version identified earlier:
cp -p /boot/initramfs-2.6.32-358.el6.x86_64.img /boot/initramfs-2.6.32-358.el6.x86_64.img.bak
Now create the initramfs for the current kernel using the specific kernel version we documented at the beginning:
dracut -f /boot/initramfs-2.6.32-358.el6.x86_64.img 2.6.32-358.el6.x86_64
For CentOS 4/5:
Create a backup copy of the current initrd using the kernel version identified earlier:
cp -p /boot/initrd-2.6.18-371.el5.img /boot/initrd-2.6.18-371.el5.img.bak
Now create the initrd for the current kernel using the specific kernel version we documented at the beginning:
mkinitrd -f -v /boot/initrd-2.6.18-371.el5.img 2.6.18-371.el5
Now run the follwoing for all versions:
cd /
sync
Now reboot the server and make sure you disconnect the CD or DVD.
Network Connection
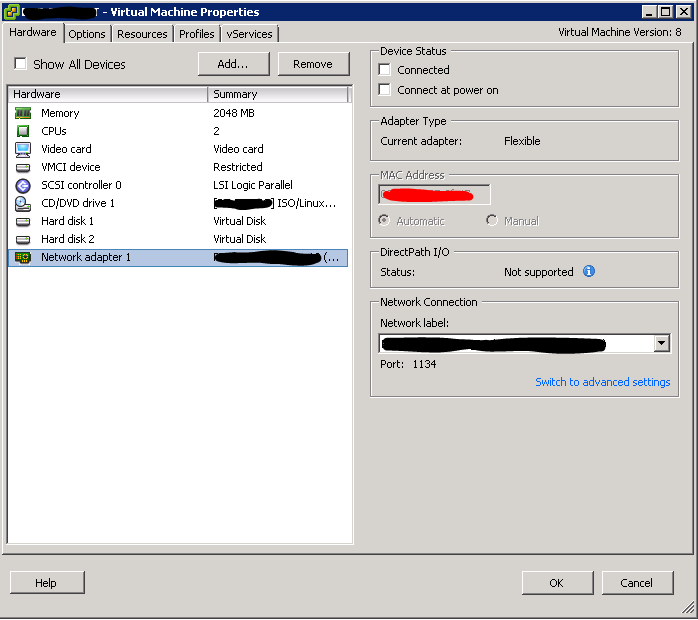
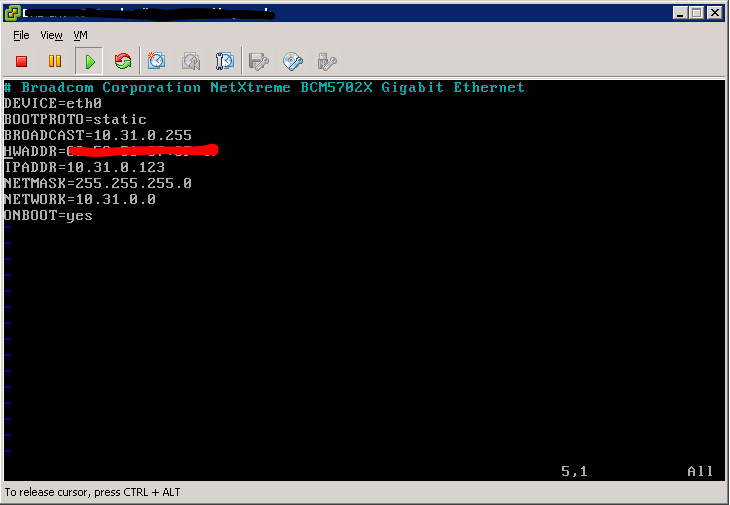
Now lets get this VM online. First edit the VM settings, click Network adapter and note the MAC Address in the location of the red blocked out text. For example, you see a MAC Address similar to: 00:0a:29:c1:1e:33
Now return to the console so we can edit the ifcfg-eth0 file by typing:
vi /etc/sysconfig/network-scripts/ifcfg-eth0
Update the MAC address to reflect the MAC address noted earlier
NOTE: There might be issues with network interface mapping, fix the network mapping by also editing the following file /etc/udev/rules.d/70-persistent-net.rules
Now restart network services by typing the following:
service network restart
Install VMware Tools
I thought is best to create a separate post about installing VMware Tools on CentOS. Will link it here once I have typed it up.
Did you ever have issues with being unable to start the conversion “unable to find supported boot loader”?
Hi Mark,
I don’t recall running into the issue you mentioned. Sound like Converter can’t located GRUB or whatever boot loader you are using.
Sorry I can’t help further.
Erza,
I attempted your process, everything went as planned however once all complete, after the second reboot the VM will not start – it boots to a flashing cursor and only echoes my keystrokes.
on the first boot following your procedure It attempts to recover some devices via journaling, and some notes about SELINUX stating it will take a while depending upon size of disk.
By the way I could only reboot the server with reboot -f following the recovery procedure. will this negate all of your process? reboot -f is like a hard reboot.
update – seems to get stuck at Starting certmonger: [OK]
followed by flashing cursor indefinitely…
I have to research that issue, sorry.
Fantastic!!! Works for me! Tanks! Tanks!
9ff8rm
u07x38